TL;DR: If reset, WinRE, and Intune wipe all fail on a Dell Laptop or Workstation, try switching Storage from RAID to AHCI in BIOS before trying reset or OS recovery again.
The problem
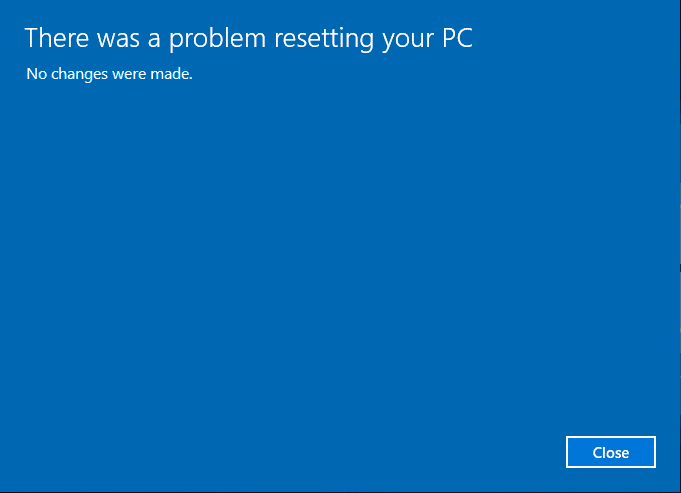
On an old work Dell device (e.g. Dell Micro, Latitude, Precision), Windows Reset and reimaging kept failing with:
There was a problem resetting your PC. No changes were made.
We needed to reimage the machine, but nothing worked.
What we tried (and didn’t fix it)
dism /online /cleanup-image /restorehealth
sfc /scannow
Startup Repair from WinRE:
Settings → System → Recovery → Advanced Startup → Restart now → Troubleshoot → Advanced options → Startup Repair
Reset from WinRE instead of Settings:
Hold Shift → Restart → Troubleshoot → Reset this PC → Keep my files or Remove everything
Wiping/reimaging from Intune
None of that resolved the reset failure or boot loops.
The cause
The issue was tied to Dell’s RAID/storage configuration and drivers. With storage in RAID mode, Reset and SupportAssist OS Recovery were hitting boot loops and “problem resetting your PC” failures. This requires that you load the drivers into WinRE which no one has time for!
The FIX! What actually worked..
Change storage mode in BIOS from RAID to AHCI before running Reset or OS recovery.
Reboot and enter BIOS Settings (typically F12 at the Dell logo).
Find the Storage (or SATA / Storage Configuration) section.
Change the mode from RAID to AHCI.
Save and exit.
Run Reset this PC or SupportAssist OS Recovery again (or reimage via your normal process).
After switching to AHCI, reset and OS recovery completed successfully and we could reimage the machines without the previous failures.
You might be asking… Why the heck are you trying to restore a Catalina backup on to a Mac that is running Sierra? A rational person would just update to either Catalina or Big Sur (released recently at the time of this post) first and then restore. Well until I started writing this post I didn’t realize that was the issue. Here is a small background story on why I’m making this post.
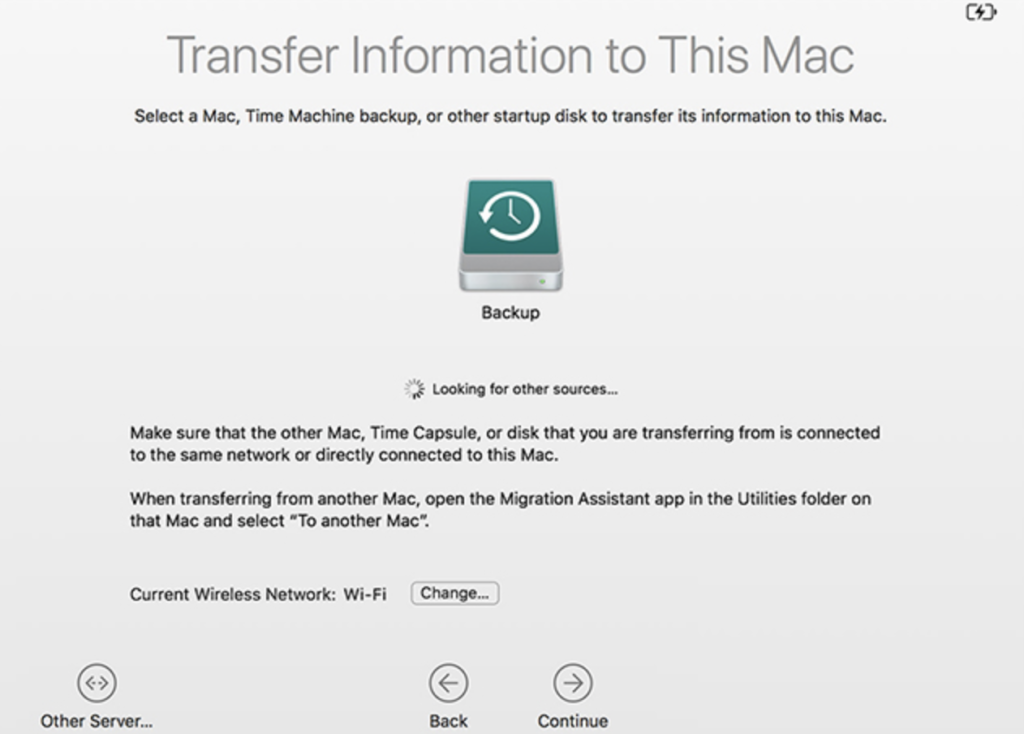
This weekend I had to get my MacBook Pro repaired. Like any responsible computer owner I made sure I had a backup available and ready using the built in time machine backups. The backups get saved to my DS1019+ Synology. Lo and behold my entire MacBook needed to be replaced. No big deal I have a backup right!? So I took the brand new MacBook home plugged it in, and attempted to restore MacBook. I was presented with this….
Anytime I would click Continue nothing would happen. I thought my backup was corrupt. After some searching it turns out Catalina 10.15 introduced a format change for Time Machine Backups on network storage solutions. Previously backups were saved as “ComputerName.sparsebundle” but since my pre-repaired MacBook was running Catalina my backup was named “ComputerName.backupbundle“. This caused some confusion apparently and was making it impossible to restore.
All you need to do is rename your ComputerName.backupbundle file to ComputerName.sparsebundle. Once I did this I rebooted the computer tried again and voilà it worked!
Long story short. When you get a repaired MacBook make sure its updated to the latest MacOS before trying any restores.
This guide assumes you have rTorrent and ruTorrent configured and running using an account other than root. If you are looking for a guide I found Dan’s guide worked for me.
Installing and Configuring Irssi
For the following steps make sure you are logged in as root.
portsnap fetch
portsnap extract
pkg update
pkg upgrade
pkg install git
cd /usr/ports/irc/irssi
make install clean
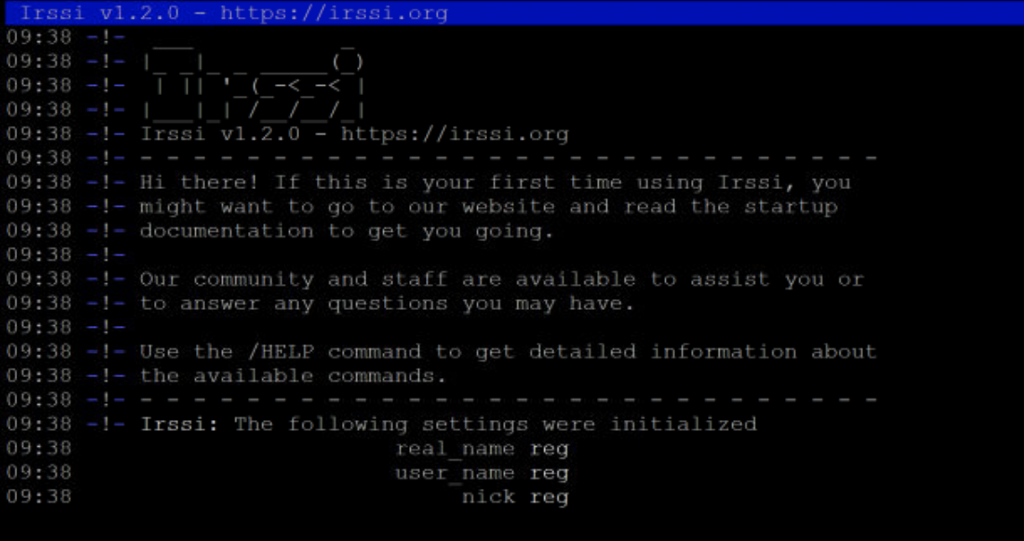
Accept all the default configurations. After the process completes confirm Irssi starts.
irssi
/quit
You should see something like this
Installing and Configuring autodl-irssi
autodl-irssi is a plugin for irssi. The steps bellow will show you how to install and configure.
First use a package manager to install the required Perl modules. If you have not installed cpan run the command below and have the installer do the configuration automatically. This will take some time.
After this command finishes su into your user account that has access to all rTorrent and ruTorrent files. All commands unless otherwise noted will run as this user.
You can change the port and password if you like. Keep the port between 20000 – 40000. Take note of this information as we will use it one time during the setup. After the configuration you will not need to remember this.
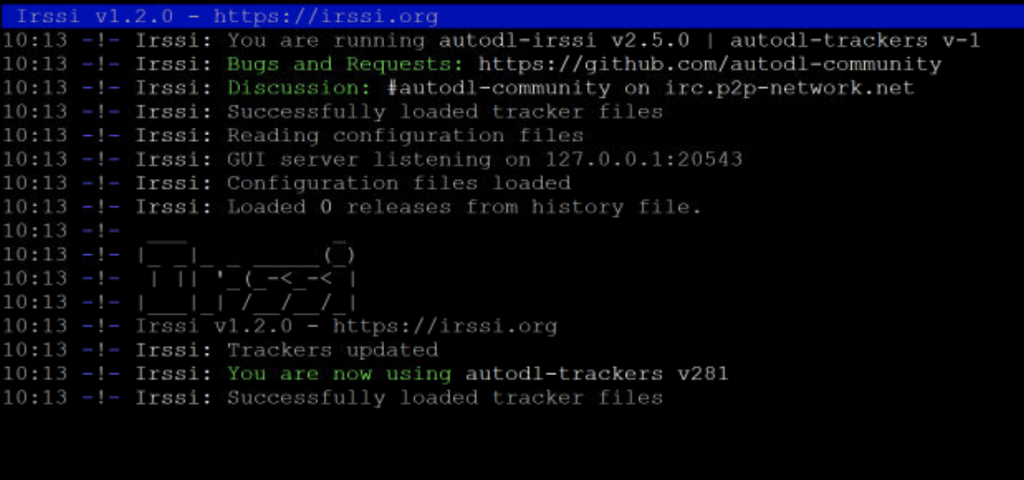
Lets test Irssi to make sure autodl-irssi is loading properly. You should see something like the screenshot below
irssi
/quit
Installing and Configuring autodl-rutorrent Plugin
The plugin requires these PHP dependencies. I will assume you have this installed and configured.
json
sockets
xml
cd /usr/local/www/rutorrent/plugins
git clone https://github.com/autodl-community/autodl-rutorrent.git autodl-irssi
mv autodl-irssi/_conf.php autodl-irssi/conf.php
Now we will edit the conf.php file and change the following values to match the port and password we set above.
Save that file and this completes the setup! Make sure you have irssi start after reboots. There are many ways to do this so if you have questions about that just comment below and I’ll help.